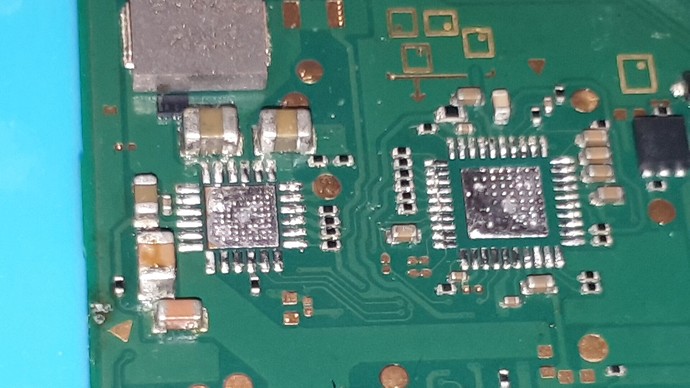
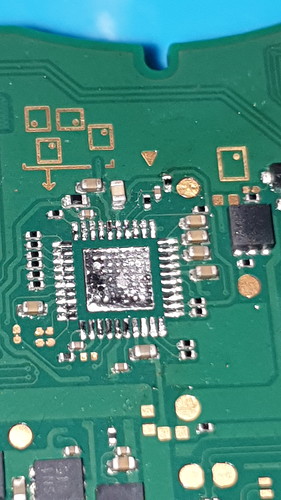
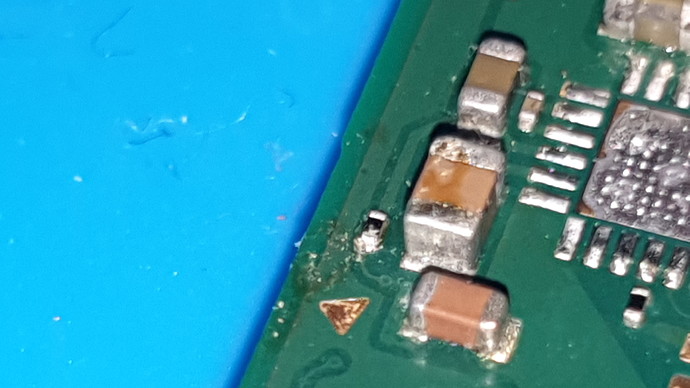
Nintendo Switch Lite - Repair Advice -

Hello guy,

I bought this off ebay to see if I could fix it since I am bored in lock down :slight_smile:
Anyway it was advertised as been broken and water damage.

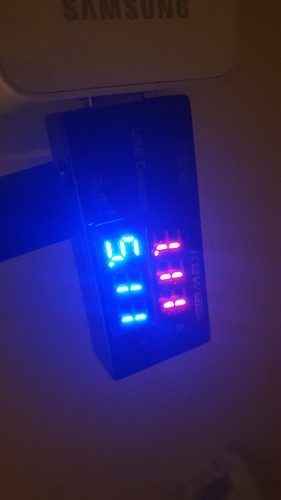
Initially I was getting 38-41 AMPS after a bit of charging it would shot up to 1.14amp at times. So I was like great! But no screen or sound.

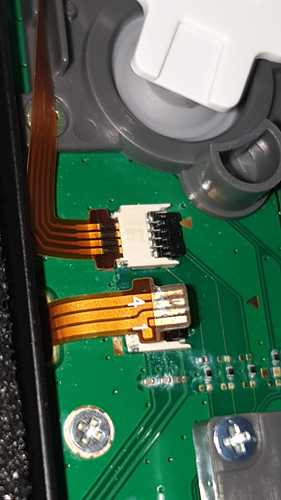
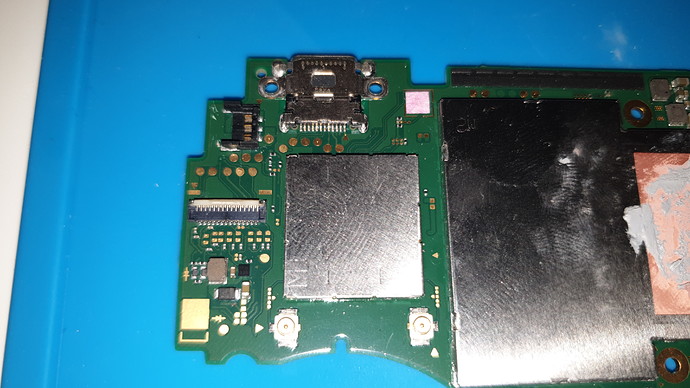
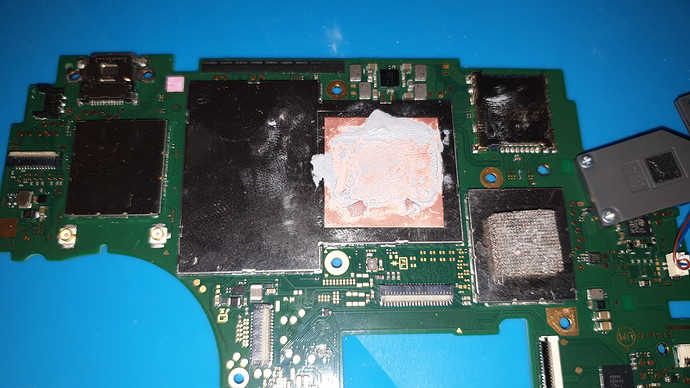
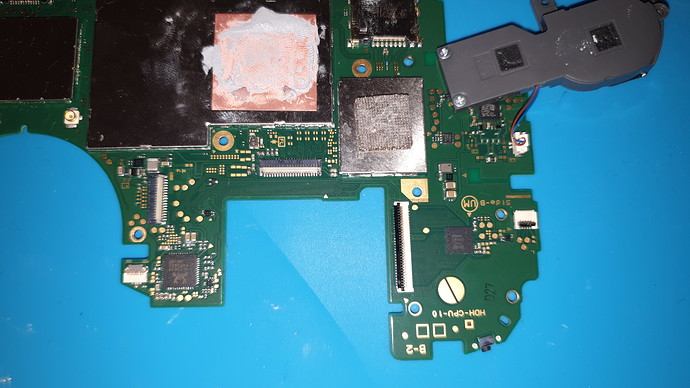
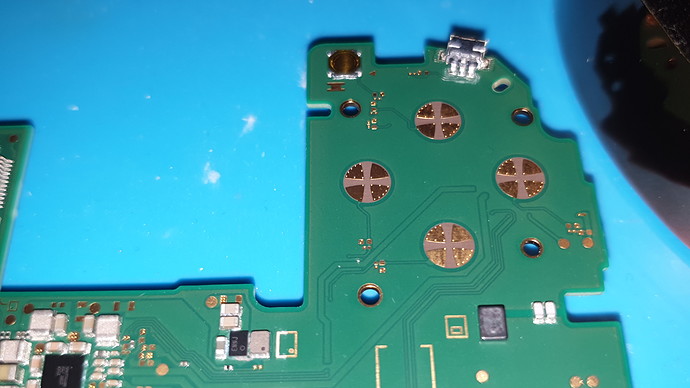
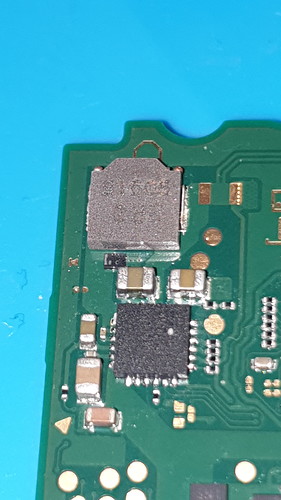
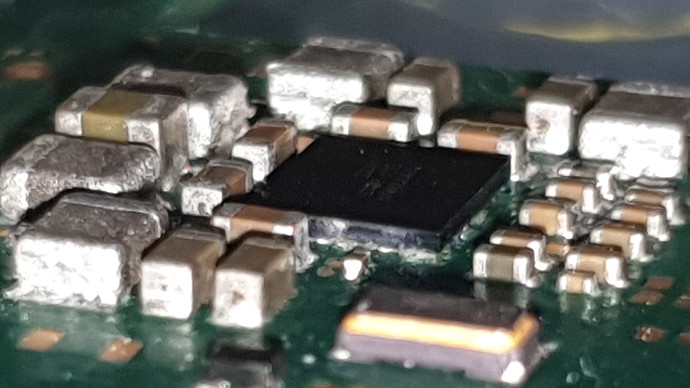
I could see on the screen it was stuck on boot loop when shining a light on screen. Took it apart and I saw corrosion on various ribbons and parts. Gave it a good cleaning with IPA. The backlight ribbon had a break in the trace, so I fixed that with solder and trip wire. Great, so backlight works! Now I see, Nintendo logo and Switch screen (and charging icon), but nothing further. It would either get stuck or go black (with back light).

I tried various chargers including official switch charger, didn’t much difference. Then I thought it could be the battery and tried a battery of another working switch lite in this switch lite. This is when things went wrong. Straight away got a blue screen. Switched it off and the blue light went away again and Nintendo logo came up again but no full boot. Tried again and blue light and came up again.

Current status :
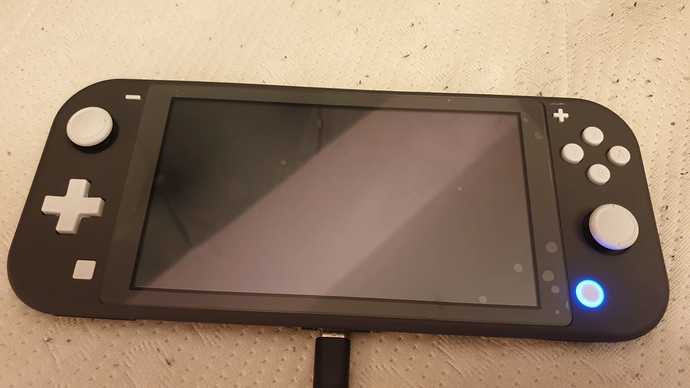
Now I don’t seem to get anything on screen or back light (maybe I need to check the ribbon again). But I get a blue light on the home button only. It’s stuck on 38-41amps.

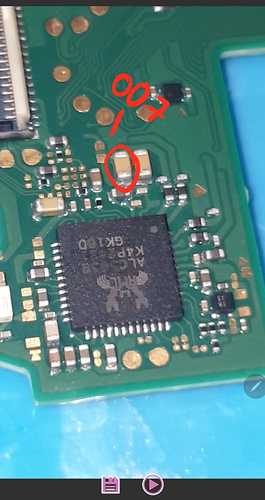
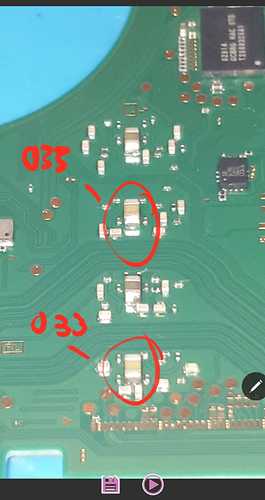
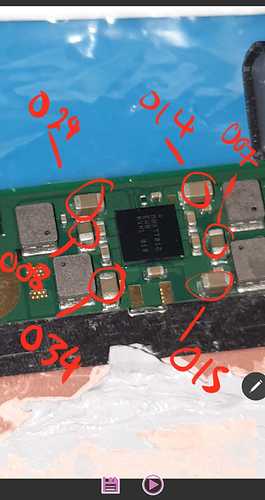
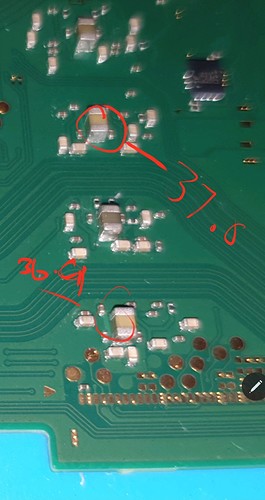
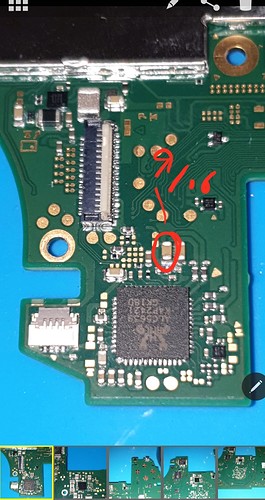
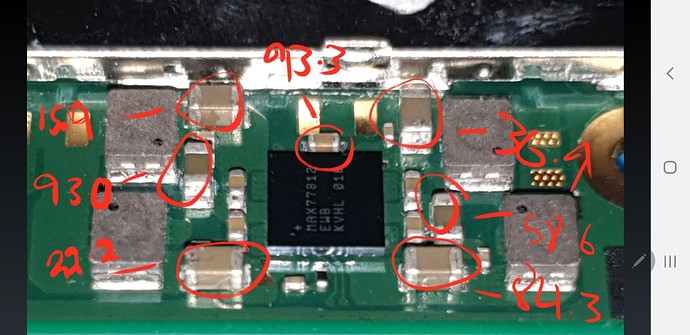
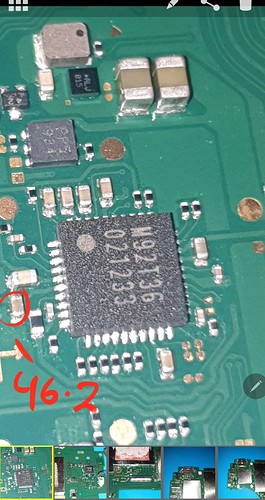
I checked for shorts and I have a few and took resistance measurements in the pictures, please see below.

Any advice on the next steps? I heard bluescreen of death is basically unrepairable but I figured might as well try something.
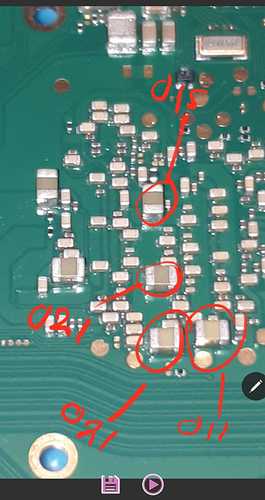
I don’t know how your meter scales, so can you confirm. for example is 033 == 33Ω or 0.33Ω ?

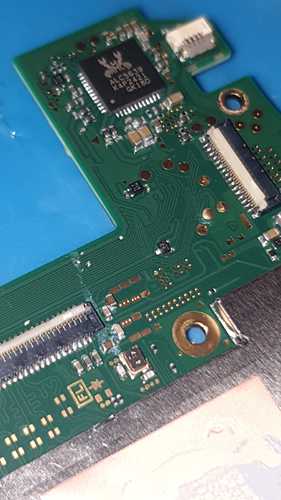
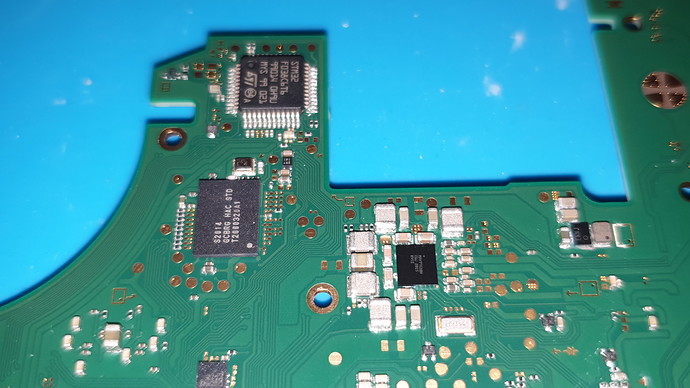
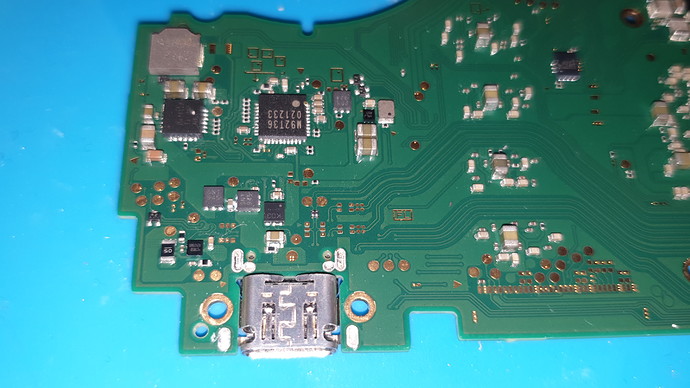
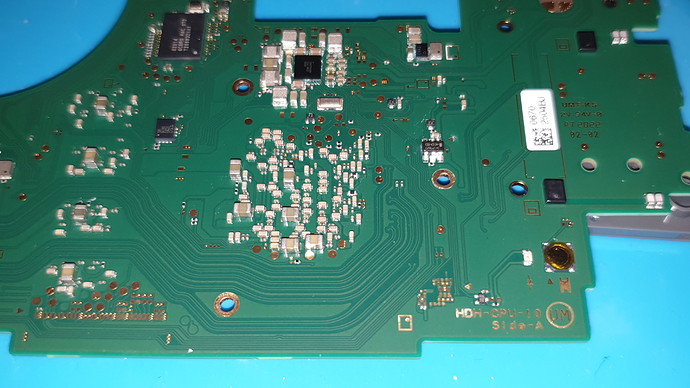
Crossing my fingers you took photos of the corrosion prior to cleaning?

Hey Severence,

I had it on 200Ω Mode and pretty sure it was 033 on the screen, with out decimals. I can double check. I and luckily I did take some pictures - sorry quality isn’t great.

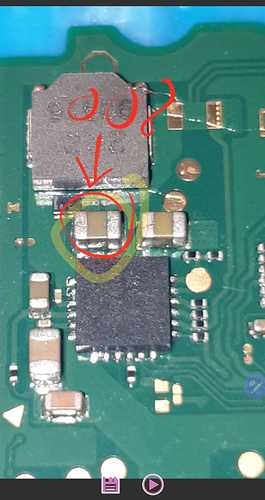
By default I’d flux boil any IC that has indicators of liquid/corrosion around or under it before doing anything else.

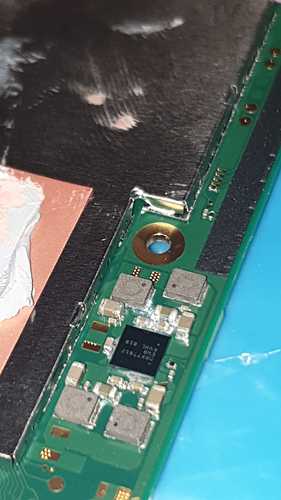
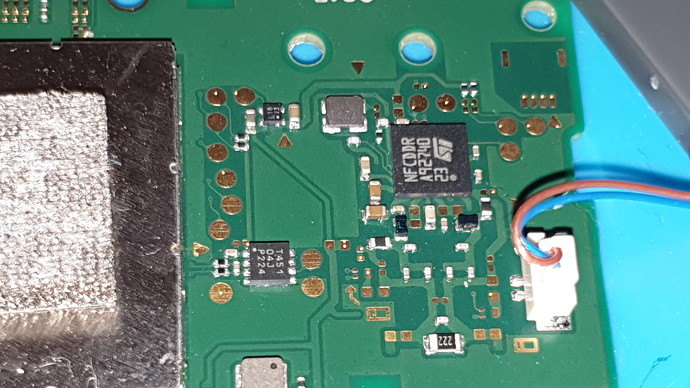
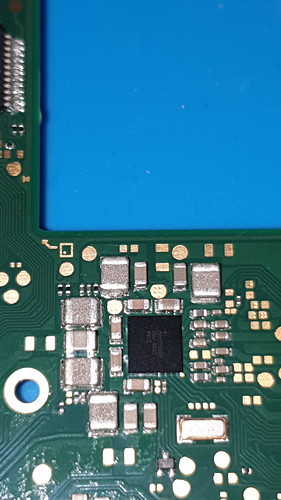
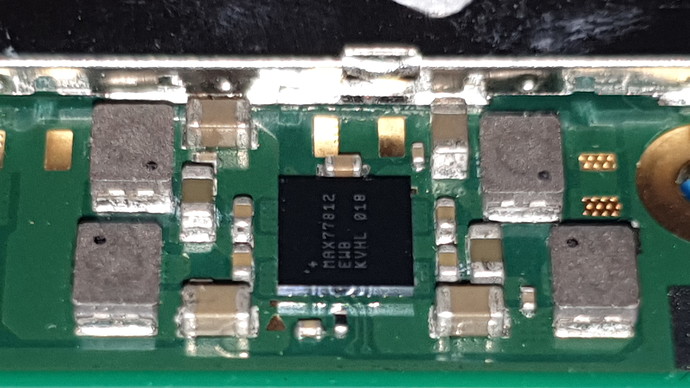
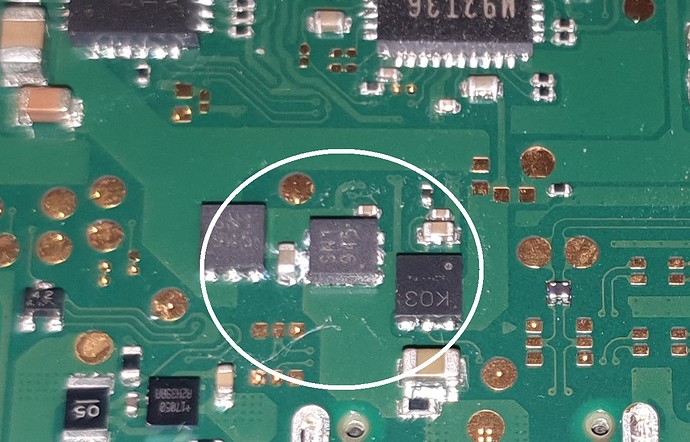
For example the Max IC below the SoC, flux it up and hit it at or < 200C to pull any crap out from under it, do the same thing for any other IC that may have been exposed etc the goal isn’t to reflow them.

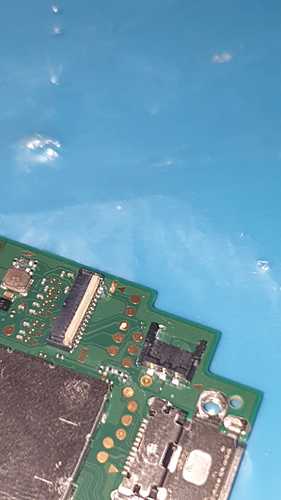
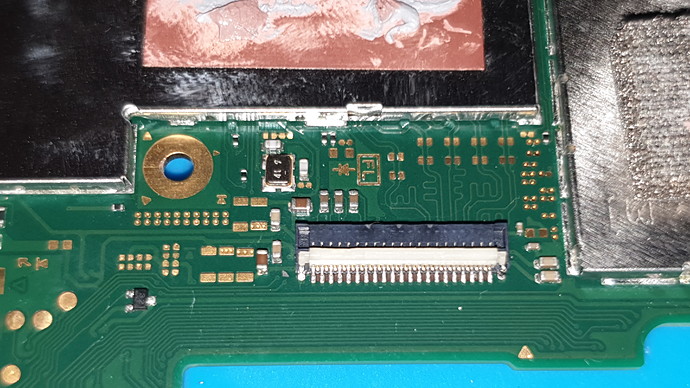
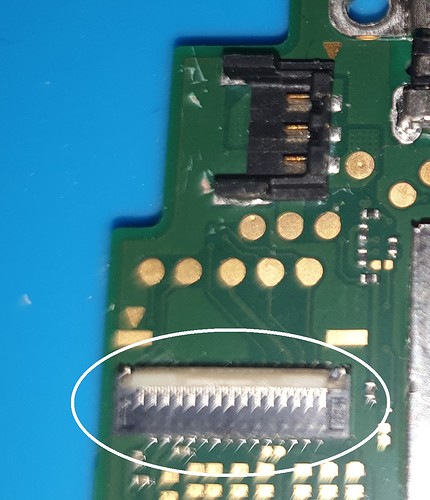
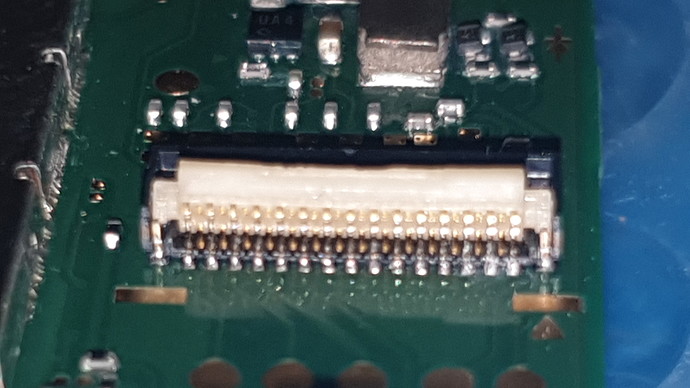
Also, inspect inside your backlight and passthrough ribbon connectors and ensure there is no scorching, which may be likely considering the damage to the ribbon in your pics

1 Like

Ok will give that a shot. How long would you typically keep the heat on for?

Thanks for your continued help!

This is a tough one to answer as it depends on the efficiency and accuracy of your station… for example on my station, i know setting it to 200C at medium to full airflow won’t bring it up to reflow temps (another station set to 200c at max airflow might in actuality be 280c for example)

I’d probably hit it for about 30 seconds or so on my station. You could also hit it from the reverse opposing side of the board which would expose it to less heat, but it’s up to you.

No worries

1 Like

Just slight update. Haven’t got around to doing the flux boil yet. But something odd happened. As I mentioned before it now stuck 38-41amps with a blue light on home button led. And for the past 24 hours I tried reseting a 100x times, charging and leave off on charge throughout the day. Well almost 24 hours after getting bsod I hit the power button it randomly made a popping sound and the amp meter is on 1.14amp like before the blue screen. Nothing is on screen and I checked with a light flashing on it. Everytime I reset it makes a popping sound. Really odd how this happened now

considering the amount of times nothing happened prior to this. I thought I let you know in case this changes anything. Blue light on home button has gone too.
Probably a good idea not to apply power to boards such as this until the faults resolved, particularly if your resistance measurement earlier were accurate (sub 1Ω)

No idea what’s causing the popping noises, at a guess it may be due to corrosion under IC/s… Was it coming from the speakers perhaps?

Can you show a photo of the main Max pmic and fuel gauge area too

Hey Severence,

Hopefully will check for you shortly. But for reference which area is the fuel guage area?

Apologies I had the meter on wrong mode. Retaken the readings.

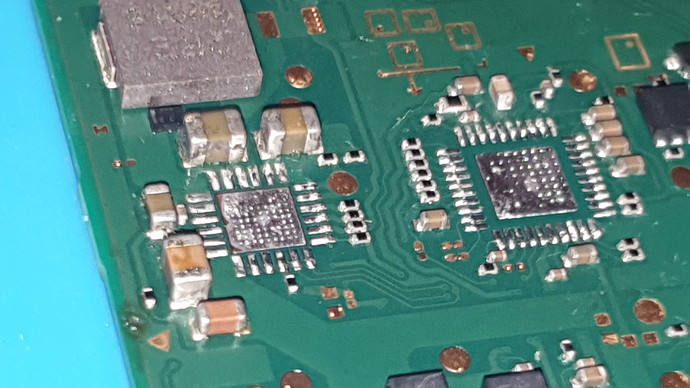
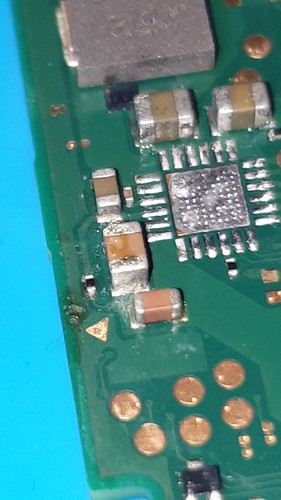
I flux boiled the two ics that hadsome liquid damage directly at 180c and rejigged the backlight ribbon. So back-light works again but am still stuck on the nintendo switch loading screen and nothing more.

The popping sound I heard might be from the speakers.

I noticed the metal sheilds near the cpu get pretty hot when I tried to switch on.

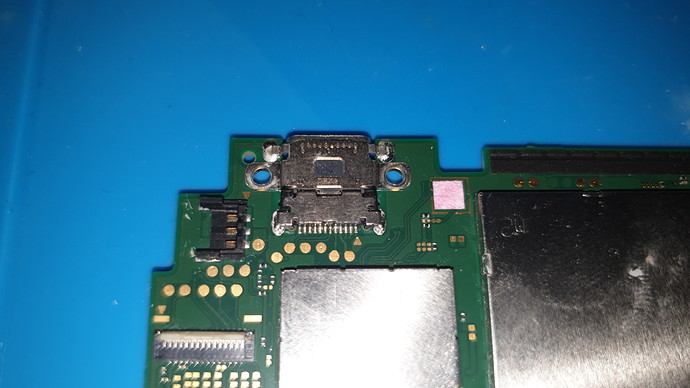
I’ve also taken various pictures of the board.

This is showing up as a short as well.

Resist the temptation :slight_smile: and refrain from powering the console on and disconnect the battery, otherwise you risk killing the SoC.

Yeah that seems low, 3V3PDR afaict, but given the corrosion around the ENXX IC it makes sense.

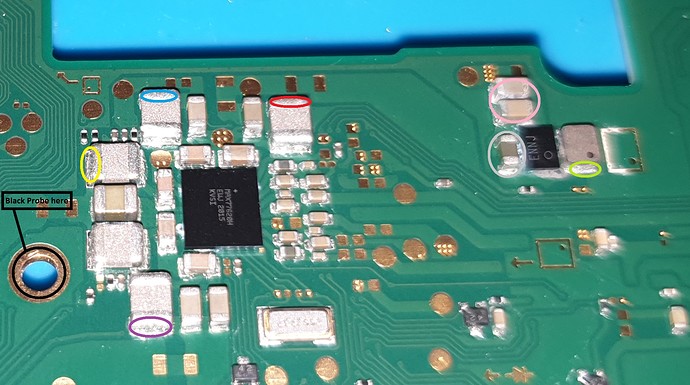
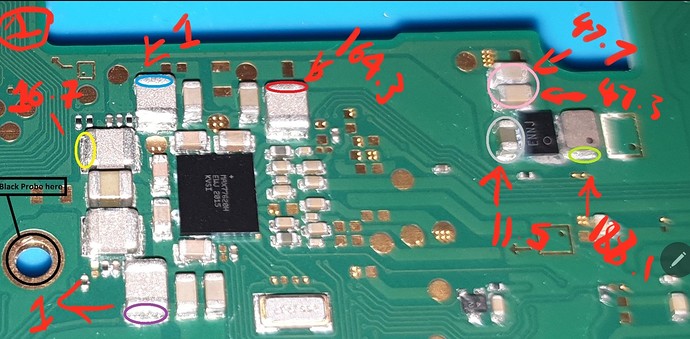
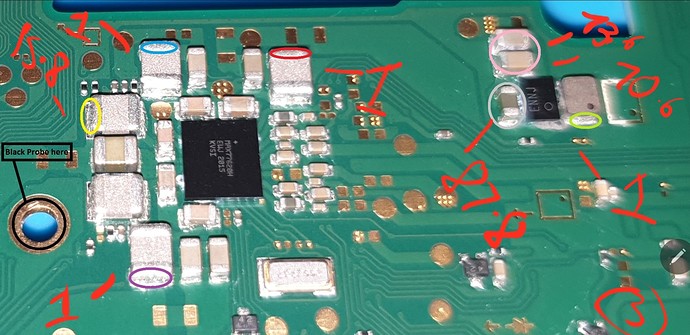
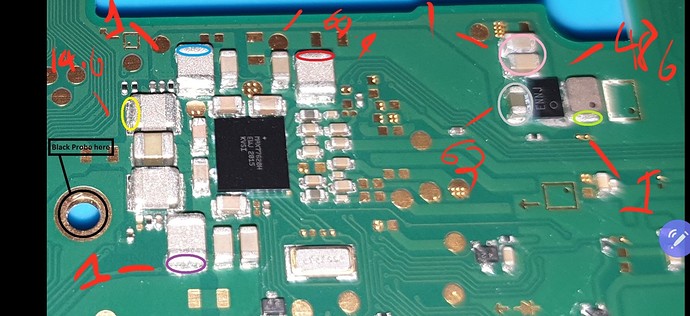
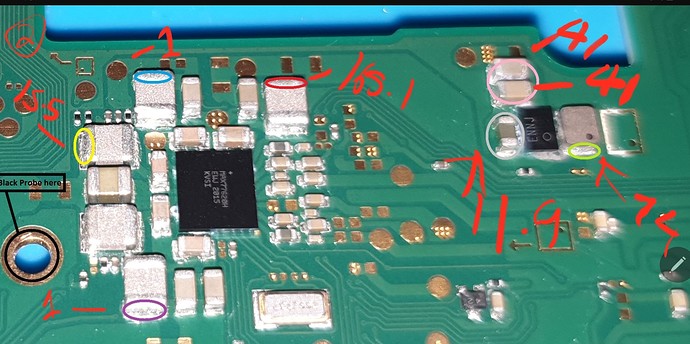
Measure resistance to ground (put your black probe on the highlighted screw hole pad) and red probe at these highlighted points points and record your readings


Afterwards flux boil these two IC’s, this may take multiple passes to effectively clean… they may even require a reflow, (if they’re still working) but stick to just flux boiling for now.

Afterwards, retake those same measurements and record the results and let me know the before and after.

The Fets here can get the same treatment, If you see any other area in similar condition then you know what to do.

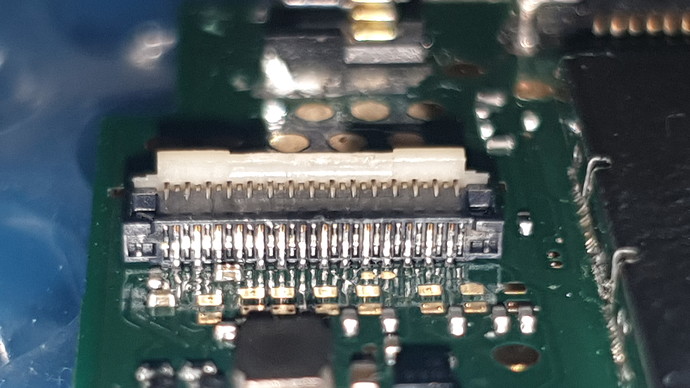
Check inside this connector (and others) for discoloured plastic, brown, blackened, scorched etc

1 Like


1 = Prior to boil
2= after boil.

There you go. Flux boiled the points mentioned plus chip to the left of the m92 chip.

Pins look fine

Despite the fact your readings are technically worse the second time round, the fact they’ve changed is a good sign (though I’m assuming you took the measurements when the board was cool) would indicate your moving something around under these IC’s

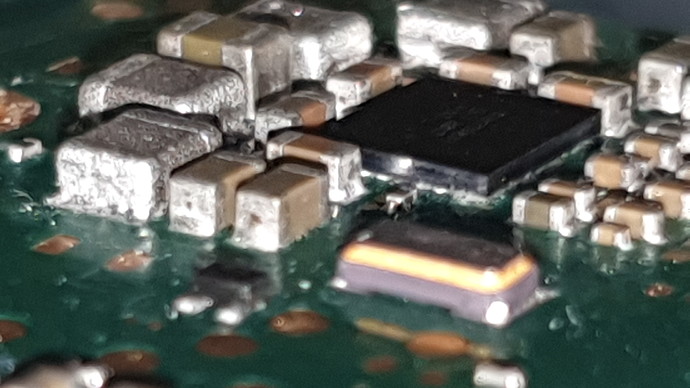
If you shine a light behind the ENXX IC and you can clearly see it between the balls then it’s clean, if not flux it up again, up your airflow and repeat procedure. Clean rinse repeat until your happy there’s no crap under the IC.

It’s possible the fault is elswhere, but considering your measurements and the corrosion, I’d be focusing my attention still on the ENXX IC,and the main Max PMIC in the photo above.

Was there any indications liquid got within SoC shield?

Do you have the equipment and any experience reballing?

yeah looks good

Just add, as i don’t think i said. You have multiple key rails shorted here.

For example, Red highlighted in the image should read in the kiloohms, pink should read in the kiloohms, grey in the kiloohms.

Purple and blue shouldn’t be so low, and yellow I’m not sure about off the top of my head on Mariko/Lites… may be normal.

If you feel the corrosion is gone and the IC’s above are spotless, then you could first attemot to reflow them but i think utlimately at some point they’re going to have to be pulled to see if it clears the shorts on the above mentioned rails.

But if you don’t have experience reballing or don’t have the equipment, then it might be a good idea to pull the M9 and BQ IC first to rule them out (as they’re easy to remove/rework) just in case the’re causing the issues here.(they are connected to a few of these key rails)

Hey Severence

I waited around 5 minutes to cool on 2nd reading. Not enough hehe?

After that I did a few more passes over theses two ics and the fetts. Although hard to see it did look like something was under the smaller ic on the right of the picture. After boiling it did look cleaner. I took some reading just now.

Thats. before picture. I feel like the two ics are clean from what I

can see.

Soc shield? I assume thats where apu/cpu sits? Looks clean on the outside and no residue on the metal borders.

I have zero experience with reballing :slight_smile:
But I have a 8582D cheapo station with hot air wand and solder iron. But eager to learn!

In fact I have little experience soldering but have been practising on similar boards e.g. removing and reapply some ics with hot air and soldering small components to the size of a 100k resistor that you get near a m92 ic. So i am confident to a degree with soldering.

I guess i can move onto the m92 and BQ chip next. I have removed a M92 before and actually have a new chip for another switch am fixing. Just waiting a microscope from china to make sure pins are good when resoldering.

That should be plenty of time to allow to cool and not skew readings.

The change in readings again in your third do seem to indicate liquid/corrosion still below the ENXX IC, i would guess the ENXX IC will be fine with further cleaning or worst case pulled, reballed etc the main PMIC may be dead though unfortunately as the readings aren’t changing enough to inspire confidence, though you can continue to repeat the boil process and see, no harm should come to it provided you heat for a set amount of time, cool, clean with IPA and repeat etc

You could also try thinning some flux in IPA so it can more easily get in and under the IC during the boil.

Ah yeah, that’s quite severe corrosion under these IC’s, tbh I’d have pulled them already and reballed or replaced. But in your case I’d stick with the flux boil method for the time being. You’ll need stencils and solder paste in order to reball and quite a good amount of practice on donor/scrap boards prior to attempting this not least because these IC’s are incredibly fragile.

That’s the big one, has the SoC (system on chip) and Ram under it. if no signs of liquid then don’t worry about it.

That station is fine, in fact i prefer these styles of stations to the more expensive turbine or diaphram in base style stations.

Good to hear, keep pacticing Pick up some stencils and grab some paste (from a genuine electronics distributor) and attempt to remove some comparable BGA IC’s from some donors or scrap boards, and wick the pads on the board and them attempt to reball the IC’s and experiment with the temp and airflow on your station and see what works for you :slight_smile:

I’d just remove them for the time being to rule them out, after your able confirm the short/s are cleared later down the road then you can put them back on the board. The goaal here is to reduce variables.

PS: I’d ordinarily suggest removing the inductors surrounding the main PMIC ini order to verify which side the short is on and to determine if it’s the PMIC at fault or the SoC or other, but as PVin rail is also near a dead short too, it likely wouldn’t make a lick of difference unfortunately

1 Like

Hi Severence,

I tried boiling few more times now but unfortunately nothing changed for the better. I added IPA as well.

I then removed the M92 and BQ chip. I am happy to say with almost no issues. All caps and resistors are in tact and they came off rather quickly compared to my very first attempt now I have better idea of heat levels. The only slightly odd things I noticed the BQ chip wanted to come off one side before the other, but in the end it was clean removal. I was using 480c on 2.5ish airflow.

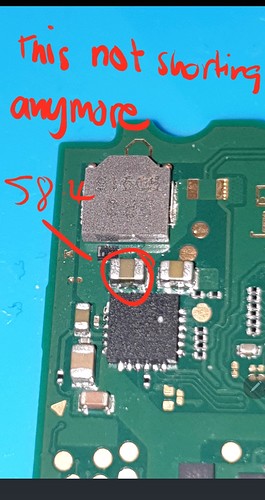
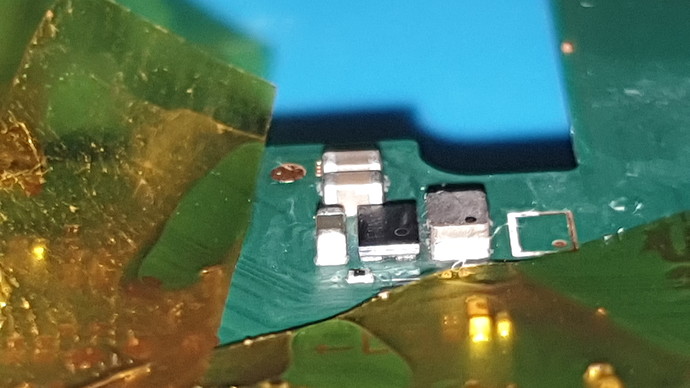
I did notice a burn mark on the board, but no component is present where the burn happened and I wasn’t even pointing in the direction of burn. I also had area covered in K Tape. I’ve uploaded a image to show the damage.

Maybe just top pcb layer?

Also uploaded my latest readings.

Otherwise looks this will go down the reball route. What stencil and equipment you suggest for this a link (dm if need be) will be helpful. I am in the UK.

Otherwise do I just keep the BQ and M92 ic off for now?

Thanks

Good stuff :+1:

Might want to crank it down just a tad, and up the airflow slightly to compensate, nothing wrong with using the higher temps but it is hard on the element. I set mine to pretty much 412c for example, and for these IC removal probably medium air (my station uses the same handle)

Might just be burnt flux, give it a scratch with your tweezers, if it’s a burn, i wouldn’t worry too much.

Yeah still bad unfortunately.

I think next you should pull ENXX IC off, after while boards still hot, clean pads with iron and leaded solder, retake those measurements and hopefully you have a change, if not, same deal for the main max pmic.

You can attempt to relow them first if you want, up to you.

Nah just leave em off for now, they may have their own issues which may muddy the waters on subsequent tests

1 Like

Thanks for reply. This bit am unsure of. I tried to find of a video on YouTube to observe but found nothing. What am wondering is this the bit I will need solder paste and stencil? Or like you mentioned there will be pads underneath and I just touch them up with leaded solder and pop the ic back on with heat gun. Thx again.